
- Create backups of the system and the users configuration files
- Restore the system to a previous state, just like the snapshot function of Virtualbox
- Create bootable ISO file from existing installation
- Copy the system from one partition to another partition.
- Upgrade software
Install Systemback on Ubuntu 18.04, 19.10 and 20.04
Ubuntu 16.04 users can install Systemback from PPA by running the following commands in terminal.
sudo add-apt-repository ppa:nemh/systemback

sudo apt update

sudo apt install systemback
The author of Systemback stopped its development in 2016, so Ubuntu 18.04, 19.10 and 20.04 are not in the supported list. If you run the above command on Ubuntu 18.04, you will see the following error,
E: The repository 'http://ppa.launchpad.net/nemh/systemback/ubuntu bionic Release' does not have a Release file.
or
E: Unable to locate package systemback
To install systemback on Ubuntu 18.04/19.10, first remove the PPA.
sudo add-apt-repository --remove ppa:nemh/systemback
The Systemback binary for Ubuntu 16.04 is compatible with Ubuntu 18.04/19.10/20.04, so we can add the Ubuntu 16.04 PPA on 18.04/19.10. Run the following command to import the GPG signing key of this PPA so that the package manager can verify signature. The signing key can be found on launchpad.net.
sudo apt-key adv --keyserver keyserver.ubuntu.com --recv-keys 382003C2C8B7B4AB813E915B14E4942973C62A1B
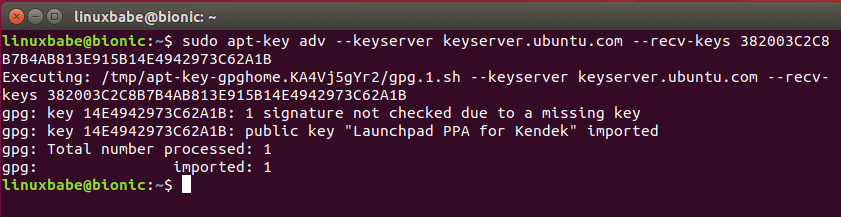
If you see the following error:
gpg: keyserver receive failed: no keyserver available
or
gpg: keyserver receive failed: No data
You can fix this error by using a different keyserver. So instead of keyserver.ubuntu.com you can use pgp.mit.edu.
sudo apt-key adv --keyserver pgp.mit.edu --recv-keys 382003C2C8B7B4AB813E915B14E4942973C62A1B
Then add the PPA on Ubuntu 18.04/19.10/20.04.
sudo add-apt-repository "deb http://ppa.launchpad.net/nemh/systemback/ubuntu xenial main"

Update package list and install Systemback.
sudo apt update

sudo apt install systemback
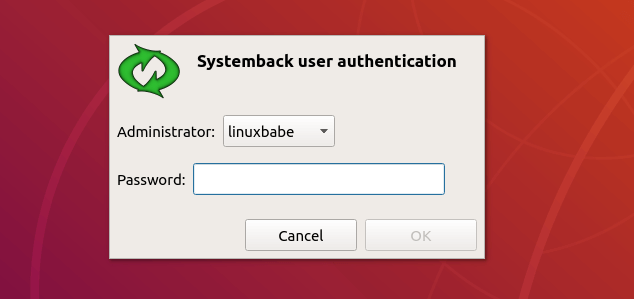
Then you can start Systemback from your application menu. You need to enter your password to use this software. After you enter the password, click OK button.
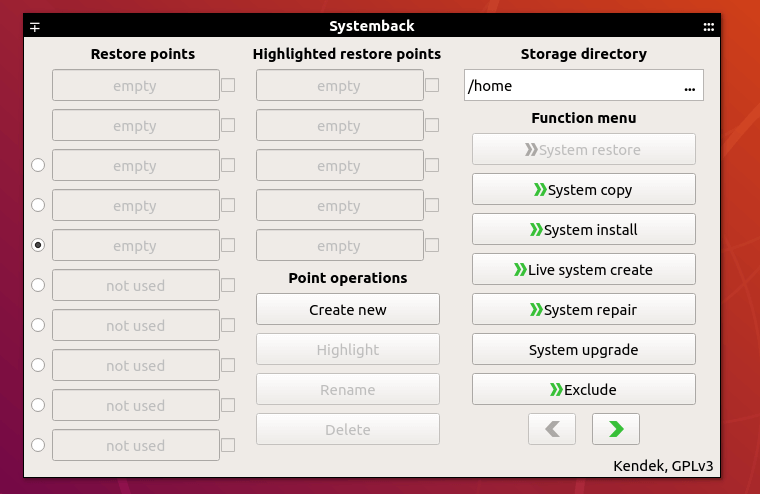
As you can see, you can create restore points of your system, restore to a point, copy the system to another partition, install the system to a new partition, create live system (bootable ISO image), repair the system and upgrade software on the system.
How to Create a Bootable ISO Image From Your Current System
Systemback can create a customized ISO image file from your current system. Every program and file can be included in the ISO.
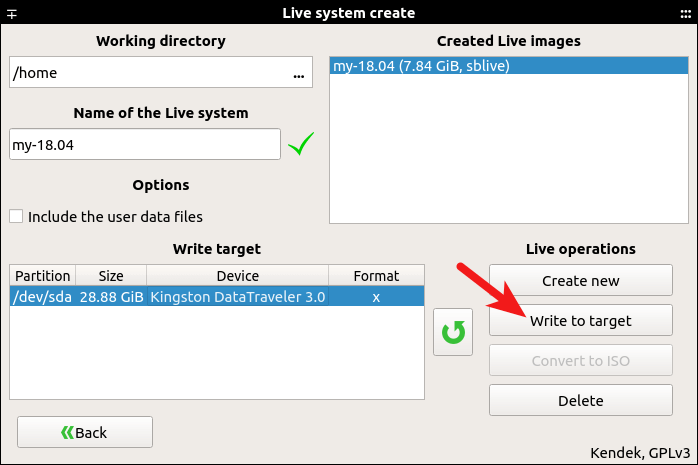
Click the Live System Create button, then give a name to your ISO file. You have the option to include the user data files. Click the Create New button to create live system.
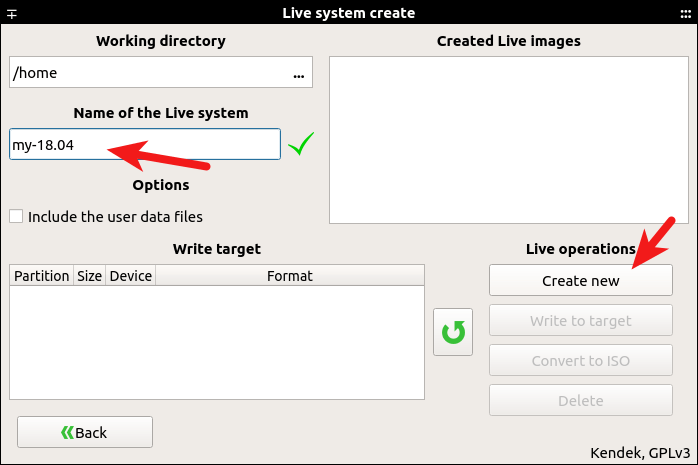
After the live system is created, you can convert the sblive file to ISO file. Note that if the sblive file is too big, you can’t convert it to ISO file. The sblive and ISO file are stored under your home directory by default, but they are not visible.
You can also insert your pen drive to your computer and write the sblive file to pen drive. (Click the reload button to detect USB drives.)
Because my system has many programs and files, this process can take some time.
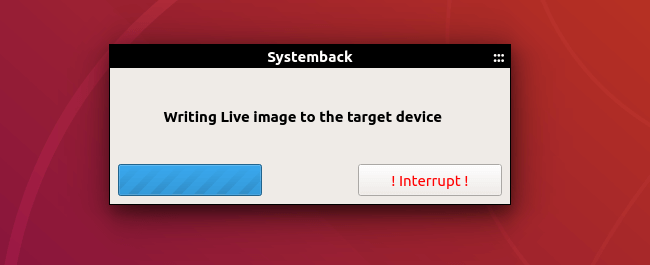
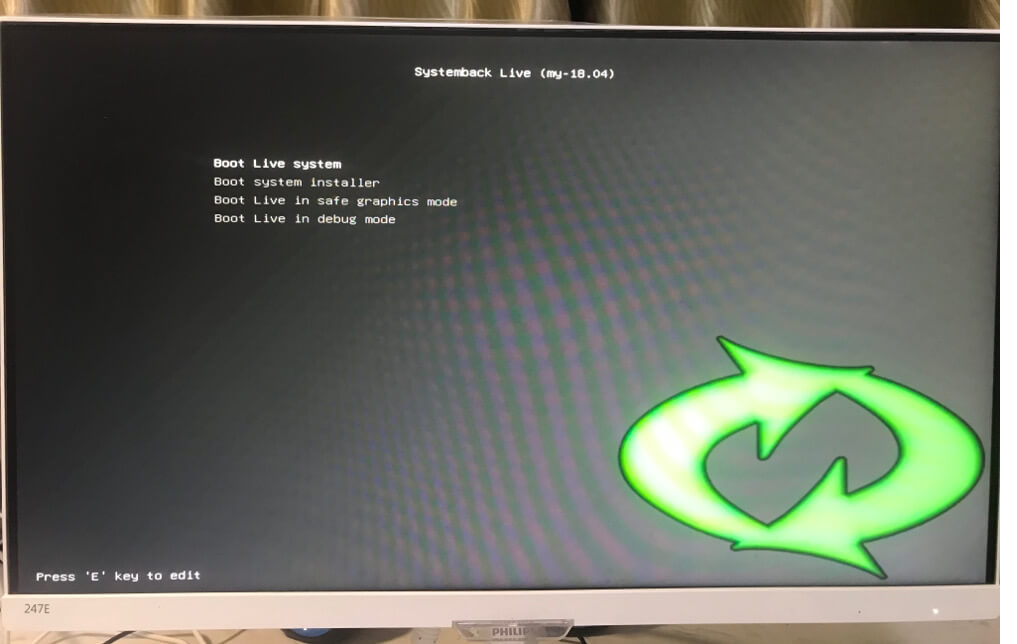
Once it’s done, you can use the bootable USB to install your customized Ubuntu system on other computers.
I hope this tutorial helped you install Systemback on Ubuntu 18.04 and 19.10.
